“Classify - Classified Ads WordPress Theme” Documentation by “JoinWebs” v4.0.9
“Classify - Classified Ads WordPress Theme”
Updated: 13-February-2019
By: JoinWebs
Informations about Updates and New Themes are always announced on Twitter and Facebook. Twitter updates are usually more up to date, Facebook updates are more detailed and easier to follow :)
Hello! First of all I would like to thank you for purchasing my theme! :)
This file will teach you how to set up and use the “classify” WordPress Theme.
This file is really extensive so you might think the theme is hard to use,
actually its not, you probably just might jump to the options page and explore everything yourself, this file is more of a reference work if you do not know what to do, or if you are not familiar to WordPress
Have fun with your new theme! best regards
JoinWebs
Table of Contents
Folder Structure of classify - top
The Theme is built with WordPress best practices in mind, therefore it makes heavy use of the WordPress template engine. What exactly does that mean?
Whenever you see a php function call like this within your php files (get_header(), get_footer() or get_sidebar() ) the theme retrieves a reusable code snippet, most of the time a chunk of code that is used in many different files.
- This approach has the benefit that you can edit a single code snippet and the changes will effect many page templates
- Its still easy to only change a single page template since you can simply include a modified copy of the snippet instead of the original one
- Last but not least it makes the folder structure clear and tidy
Apart from the php structure the theme uses a lot of modern CSS3 features, most notably the power of media queries to serve different layouts for different viewport sizes. If you use a modern browser (IE9 +, Chrome, Safari, Firefox) and resize your browser window you will realize that the theme adapts its size to the viewport.
Installation - top
2.1 Install theme - top
Uploading Classify via FTP to WordPress
- Download the zipped theme pack to your local computer from themeforest and extract the ZIP file contents to a folder on your local computer.
- In the extracted folder you will find 'classify.zip' Extract this file .
- Using an FTP client to access your host web server
- Upload the Theme files in the extracted folder called 'classify' to wp-content/themes directory provided by WordPress.
- Visit Administration > Appearance > Themes, under the Manage Themes tab, under the Available Themes, if necessary navigate to the page displaying that Theme, then click the Activate link to make the Theme, the Current Theme.
- For More information about installation themes Visit : http://codex.wordpress.org/Using_Themes
- Download the zipped theme pack to your local computer from themeforest and extract the ZIP file contents to a folder on your local computer.
- Log into your WordPress admin panel and click on the “Appearance” tab.
- Now click on the "Add New Themes" tab.
- Click on the "Upload" button, "Browse" for file called Classify.zip In the extracted folder select "Open".
- Click the "Install Now" button.
- Activate the theme from this page, OR "Return to Themes Page" and activate from there
Note: After active theme, Your Screen will look like this.
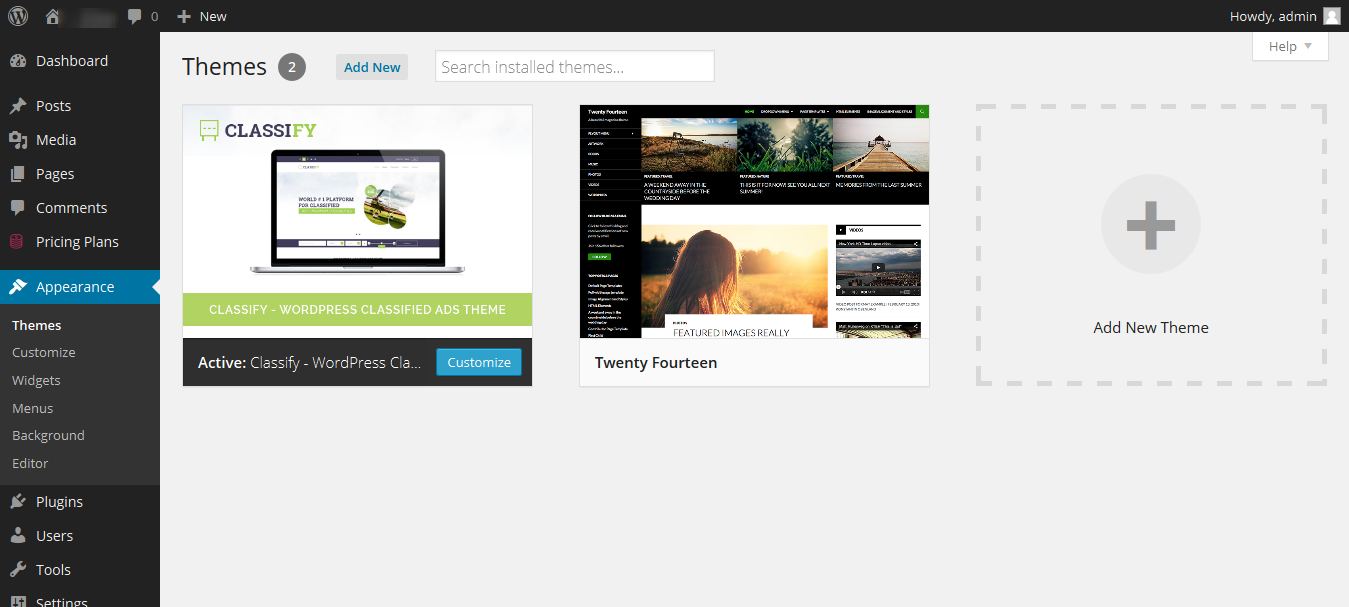
2.2 Install plugins - top
After the theme activation you'll see an info box about installing some plugins:

Click on Begin Installation.
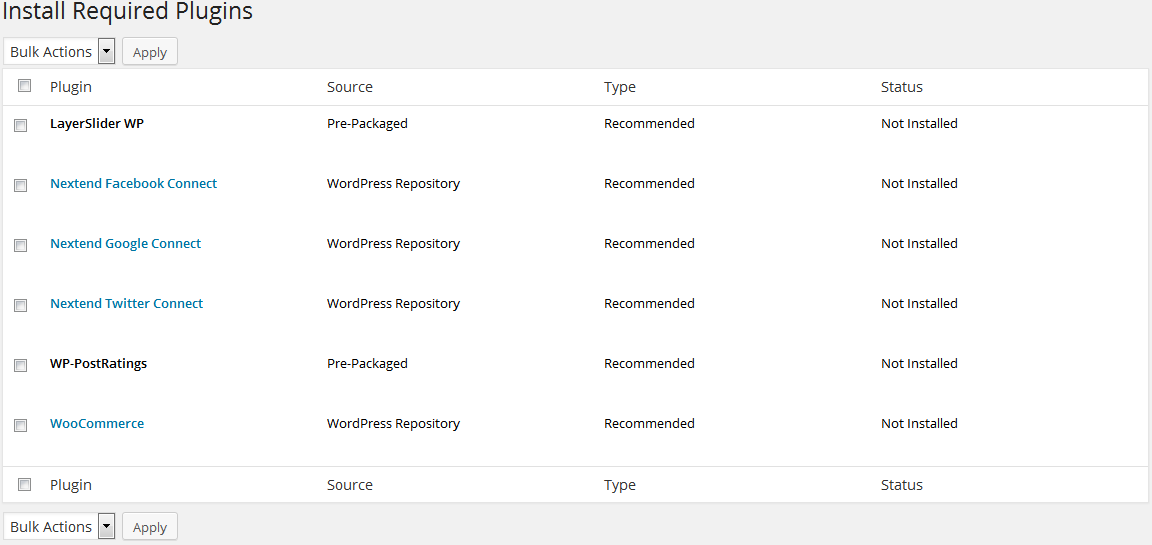
To get all the features you see on our demo, make sure you'll install all of them.
After to Install plugin come back on WordPress Dashboard and you will see screen like this.

You must need to install WooCommerece Page if you want to setup Shop on your website.
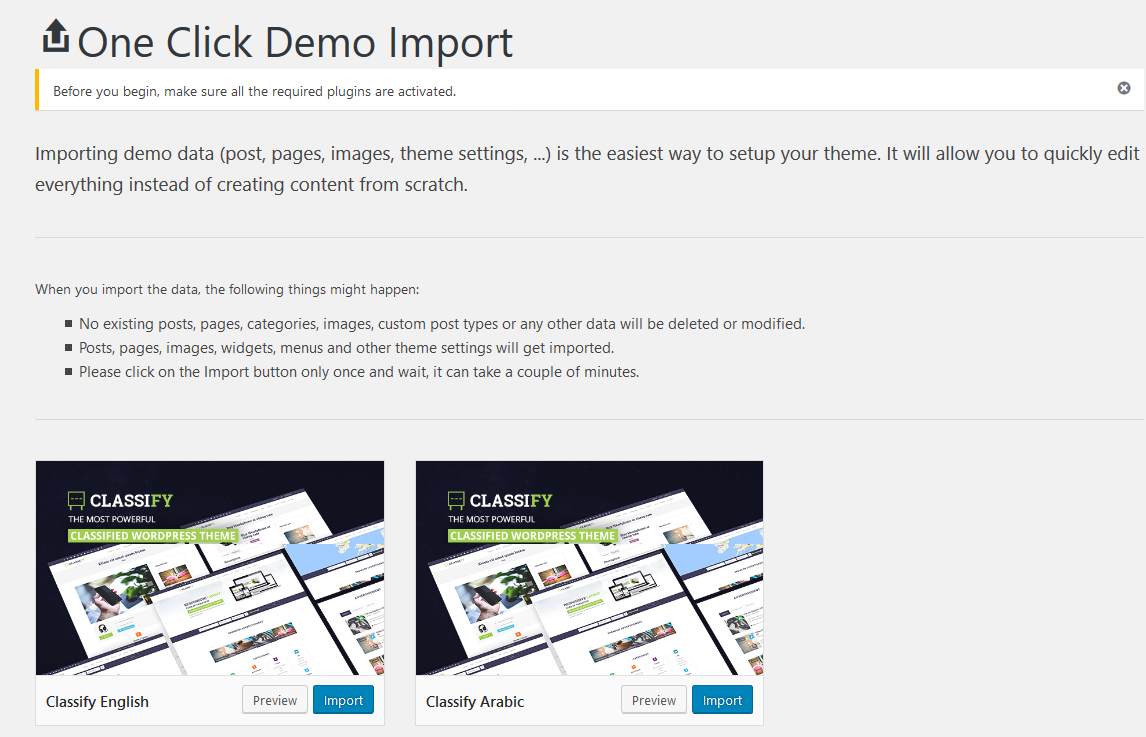
2.3 Import content - top
To import content go to WordPress Dashboard -> Appearance -> Import demo data. From here select which demo you want to import English or Arabic.
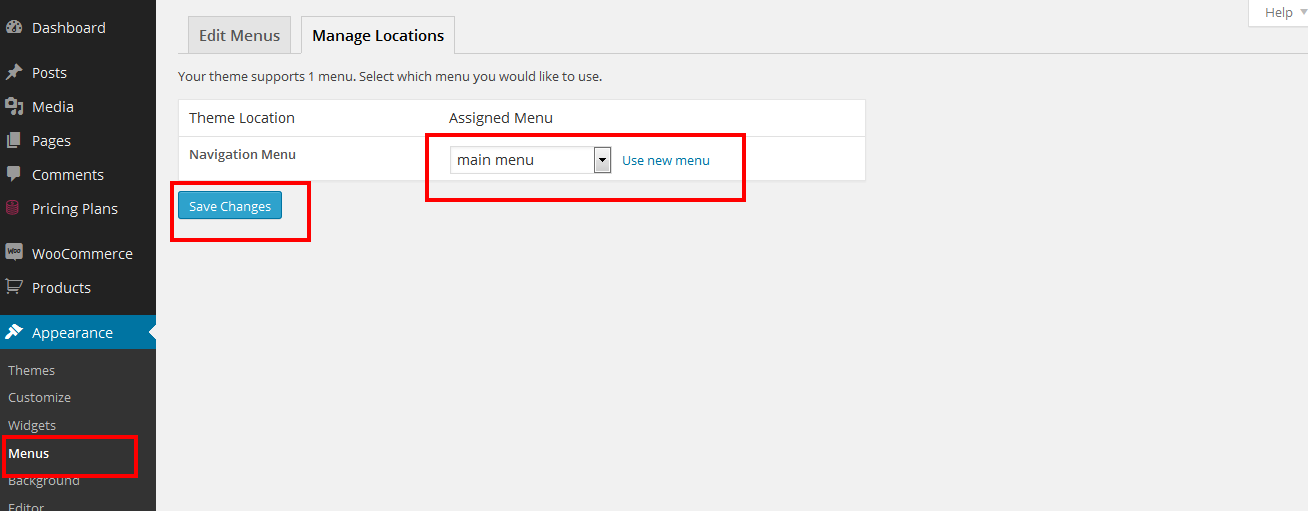
After the importing demo content is done we have to setup the menu. Go to Dashboard -> Appearance -> Menus. Here Select Main Menu first from "Select a menu to edit:". After that select the menu location ( see 2 on picture ) and save the menu.
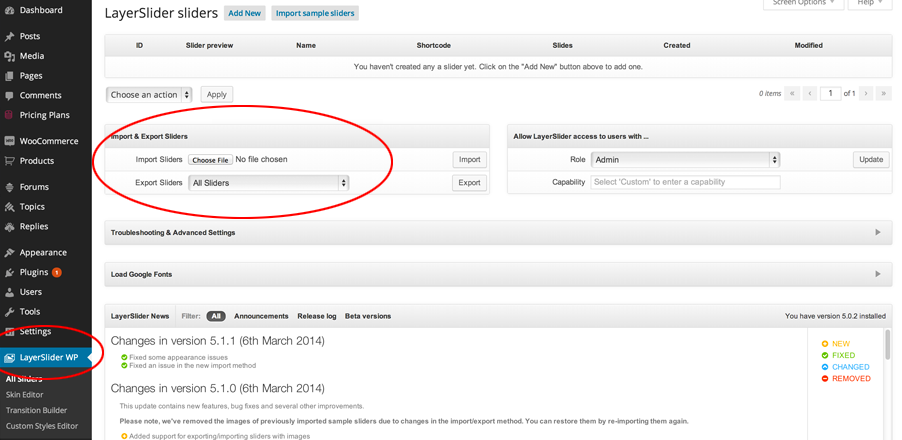
2.5 Import LayerSlider content - top
Go to dashboard -> LayerSlider WP -> On import block select the file located in Dummy-Content/LayerSLider.json click "Import"
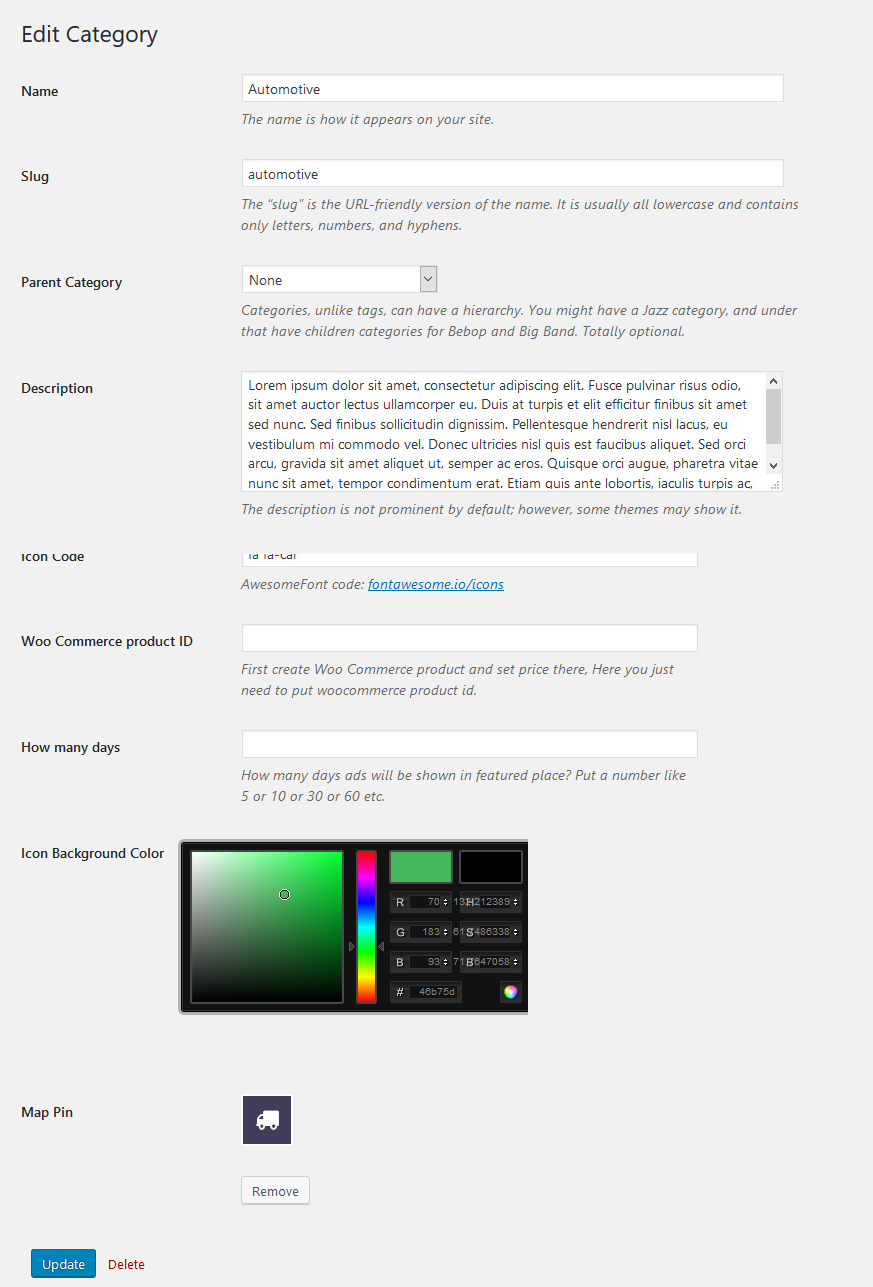
2.6 Setup Categories icon and colour - top
To setup categories icons go to WordPress Dashboard --> All Posts -> Categories. Click on main category and there you'll have custom field for category icon code, a color picker and an upload image for icon. The icon code are from http://fontawesome.io/icons/ , If you want to use image icons then you can use image from https://www.flaticon.com/ Please download PNG images (Size = 64px)
Automotive: color - 46b75d, icon code - fa fa-car
ELECTRONICS : color - ff7e3e, icon code - fa fa-lightbulb-o
Fashion : color - 86267e, icon code - fa fa-female
Jobs: color - 009996, icon code - fa fa-briefcase
MATRIMONIALS : color - e76b77, icon code - fa fa-heart
Pets & Animals : color - 39444c, icon code - fa fa-paw
REAL ESTATE : color - adb337, icon code - fa fa-home
Services : color - 44baff, icon code - fa fa-wrench
2.8 Miscellaneous - top
Setting up the Theme Options - top
If you want to change the general Options of the Theme open the “classify” Theme Options Panel (located in your admin sidebar) and click it, you will notice several tabs with options, which we will discuss now one by one.
Watch this video for theme options or read documentation
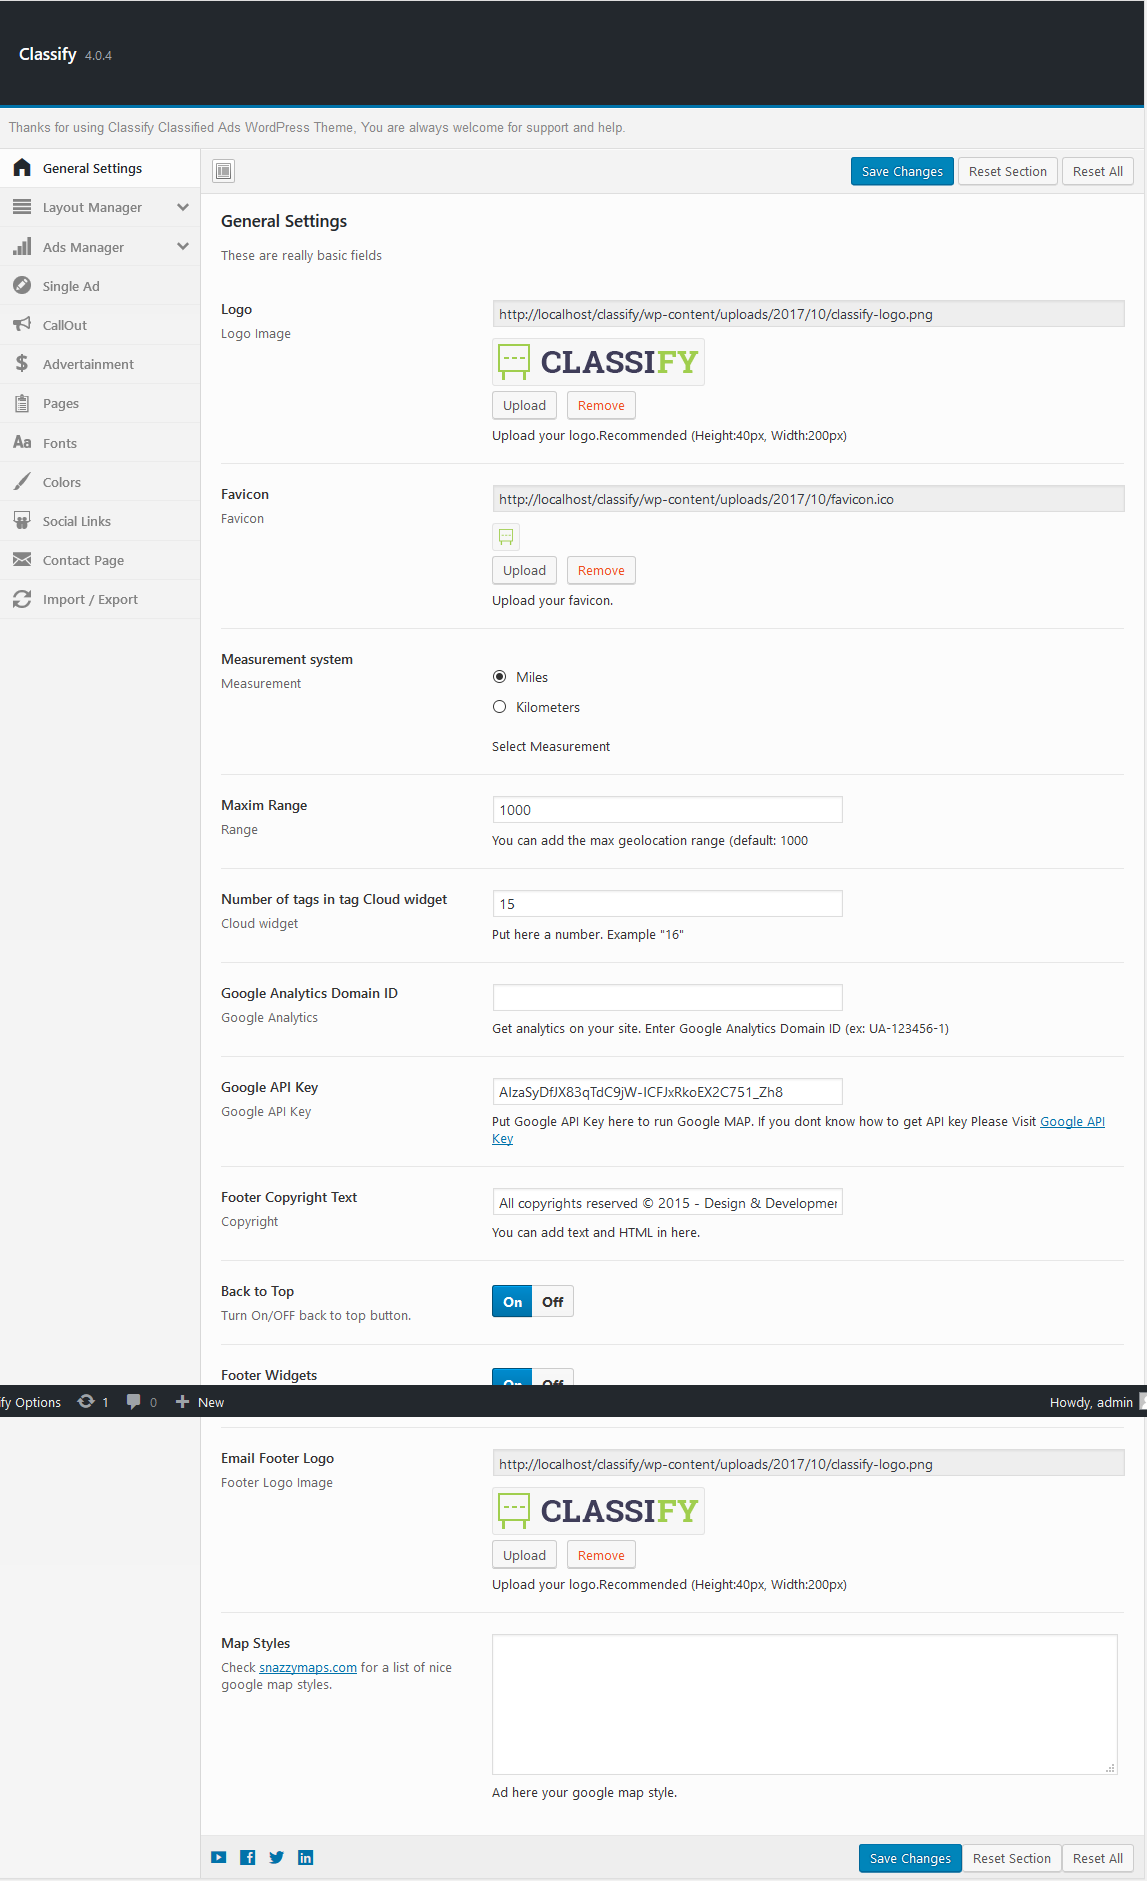
General Settings- topHere you will add the logo, favicon and google analitycs id, google map styles.
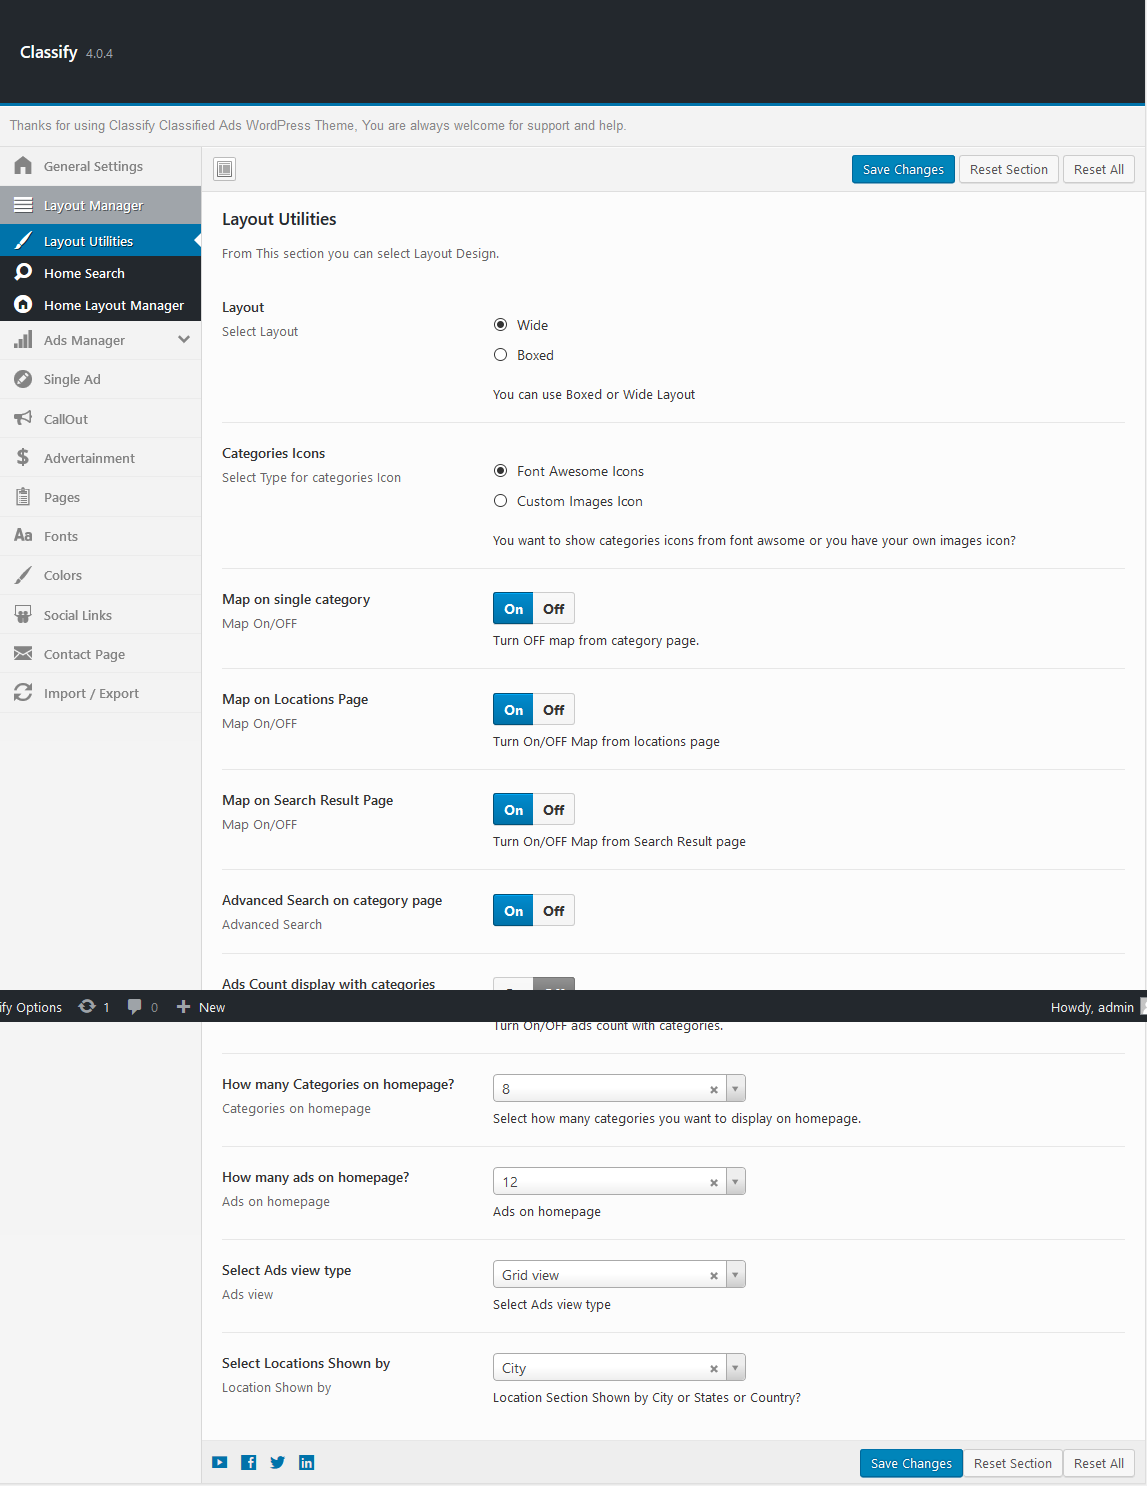
Layout Utilities- top
From Layout Utilities you can manage your theme layout. We have also shown short description with each point.
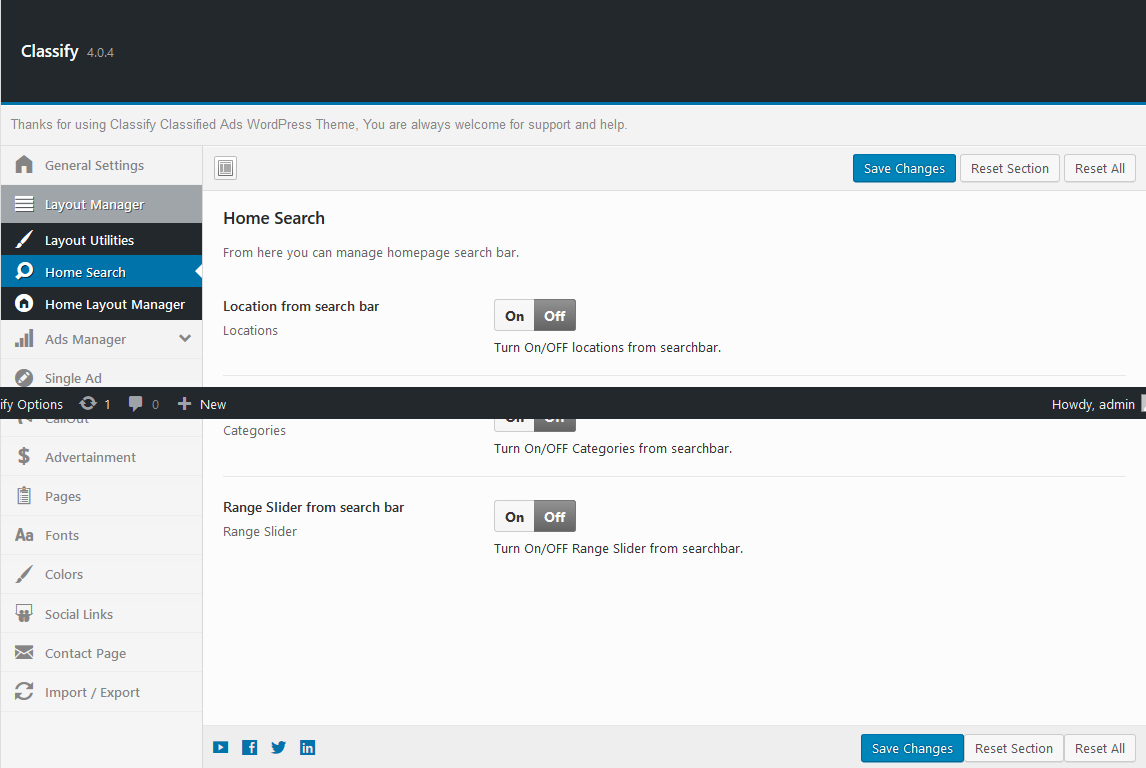
Home Search- top
From Home search you can manage Home Search elements.
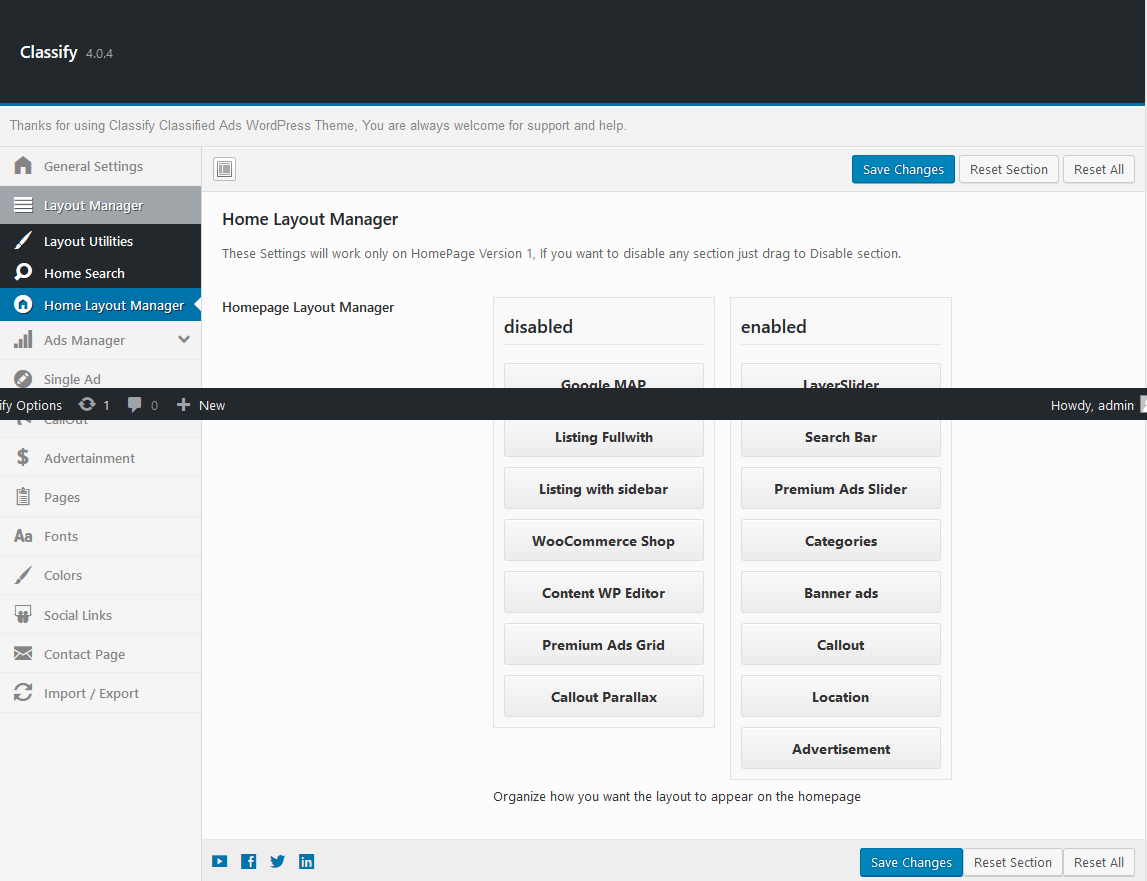
Home Layout Manager- top
From Layout Manager you can enable or disabled any section from homepage.
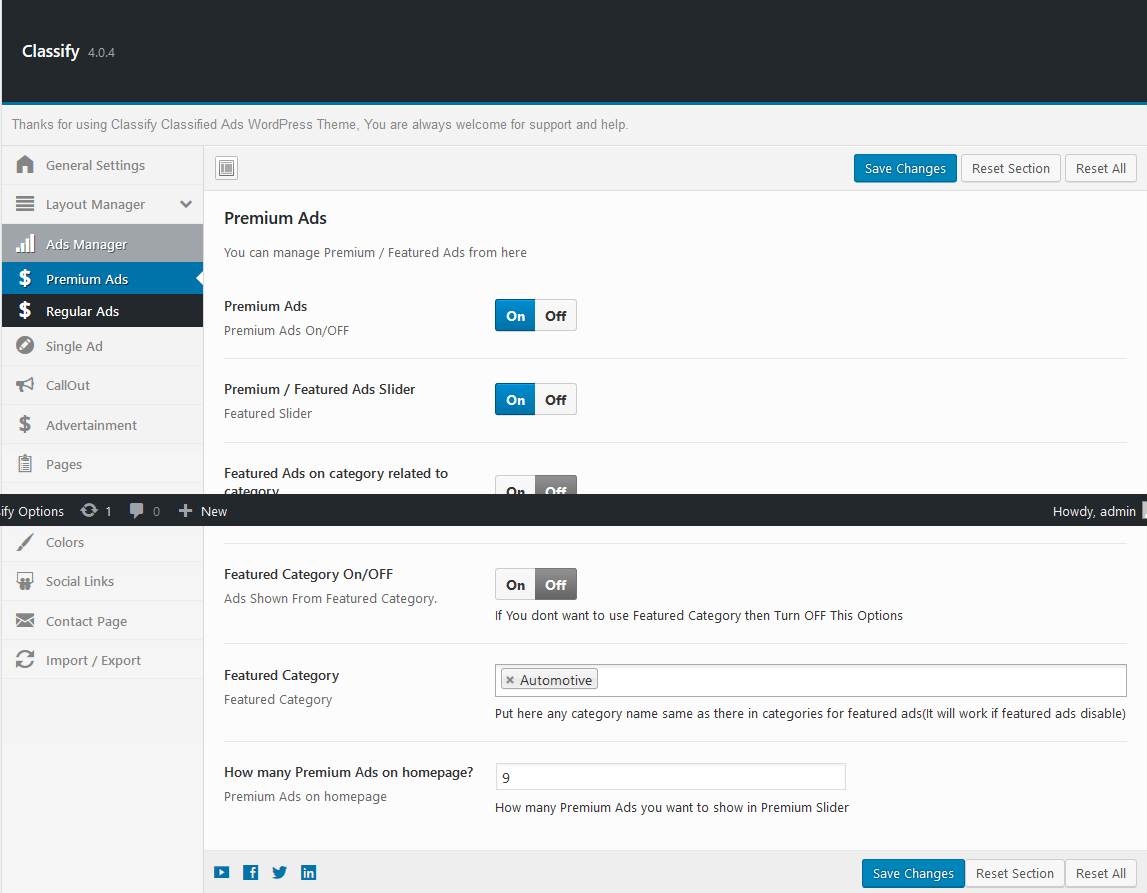
From here you can manage how premium ads will work.
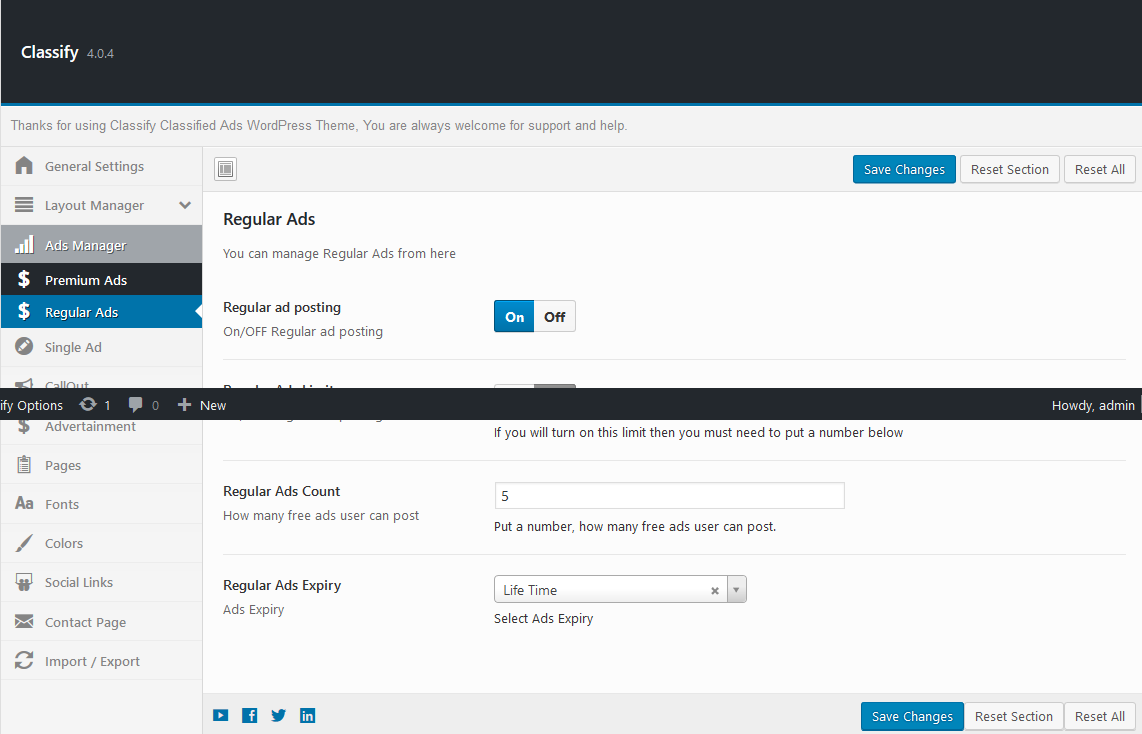
Regular Ads- top
From regular ads you can manage ad expiry and free ads limit.
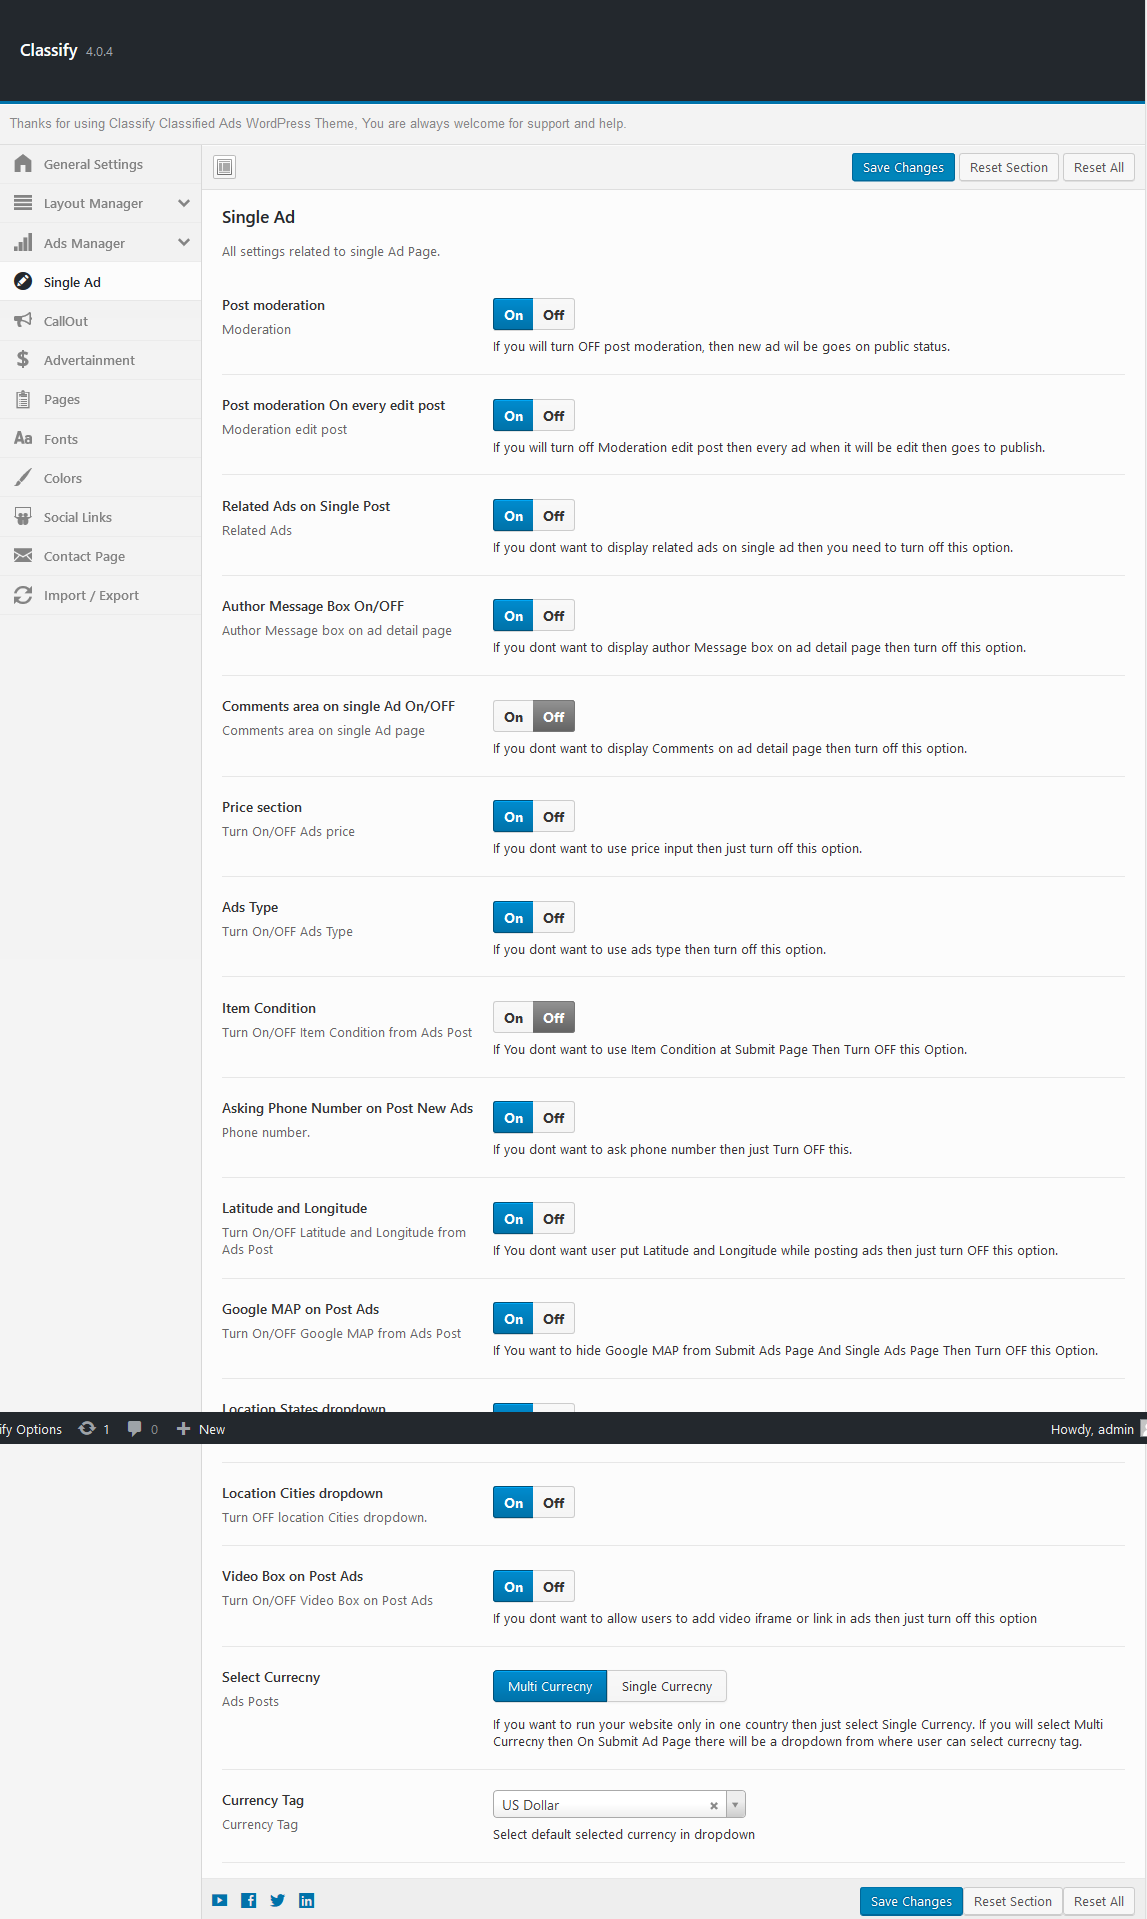
Single Ad- top
From this section you can manage your single ad layout or submit ad form.
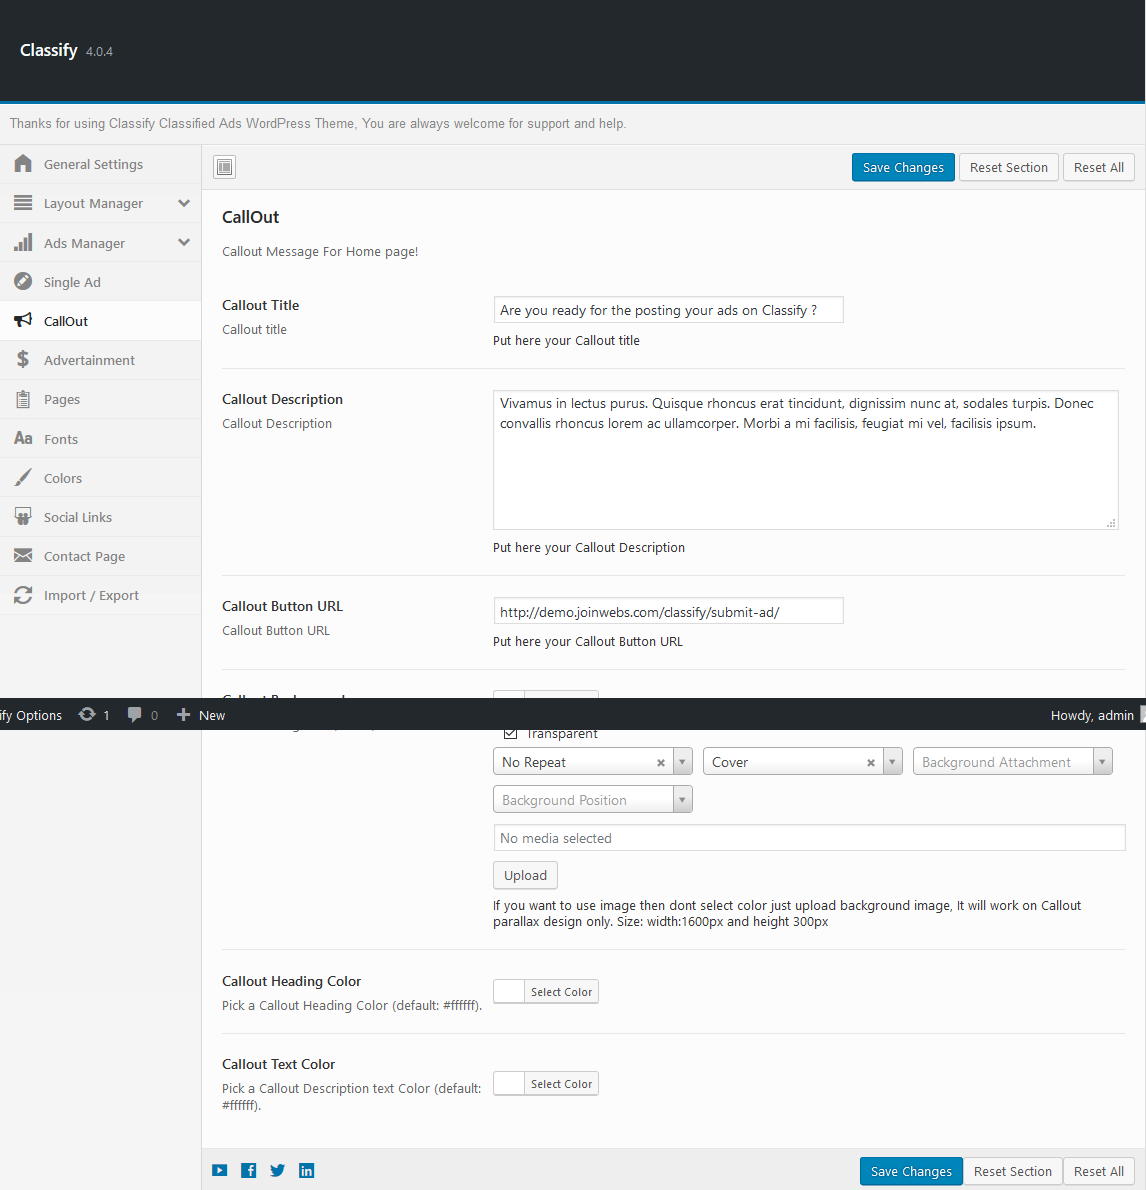
Callout- top
From here you can manage your homepage callout section.
Google Ads Setup- top
Here you can setup Google Adsense or Other image ads.

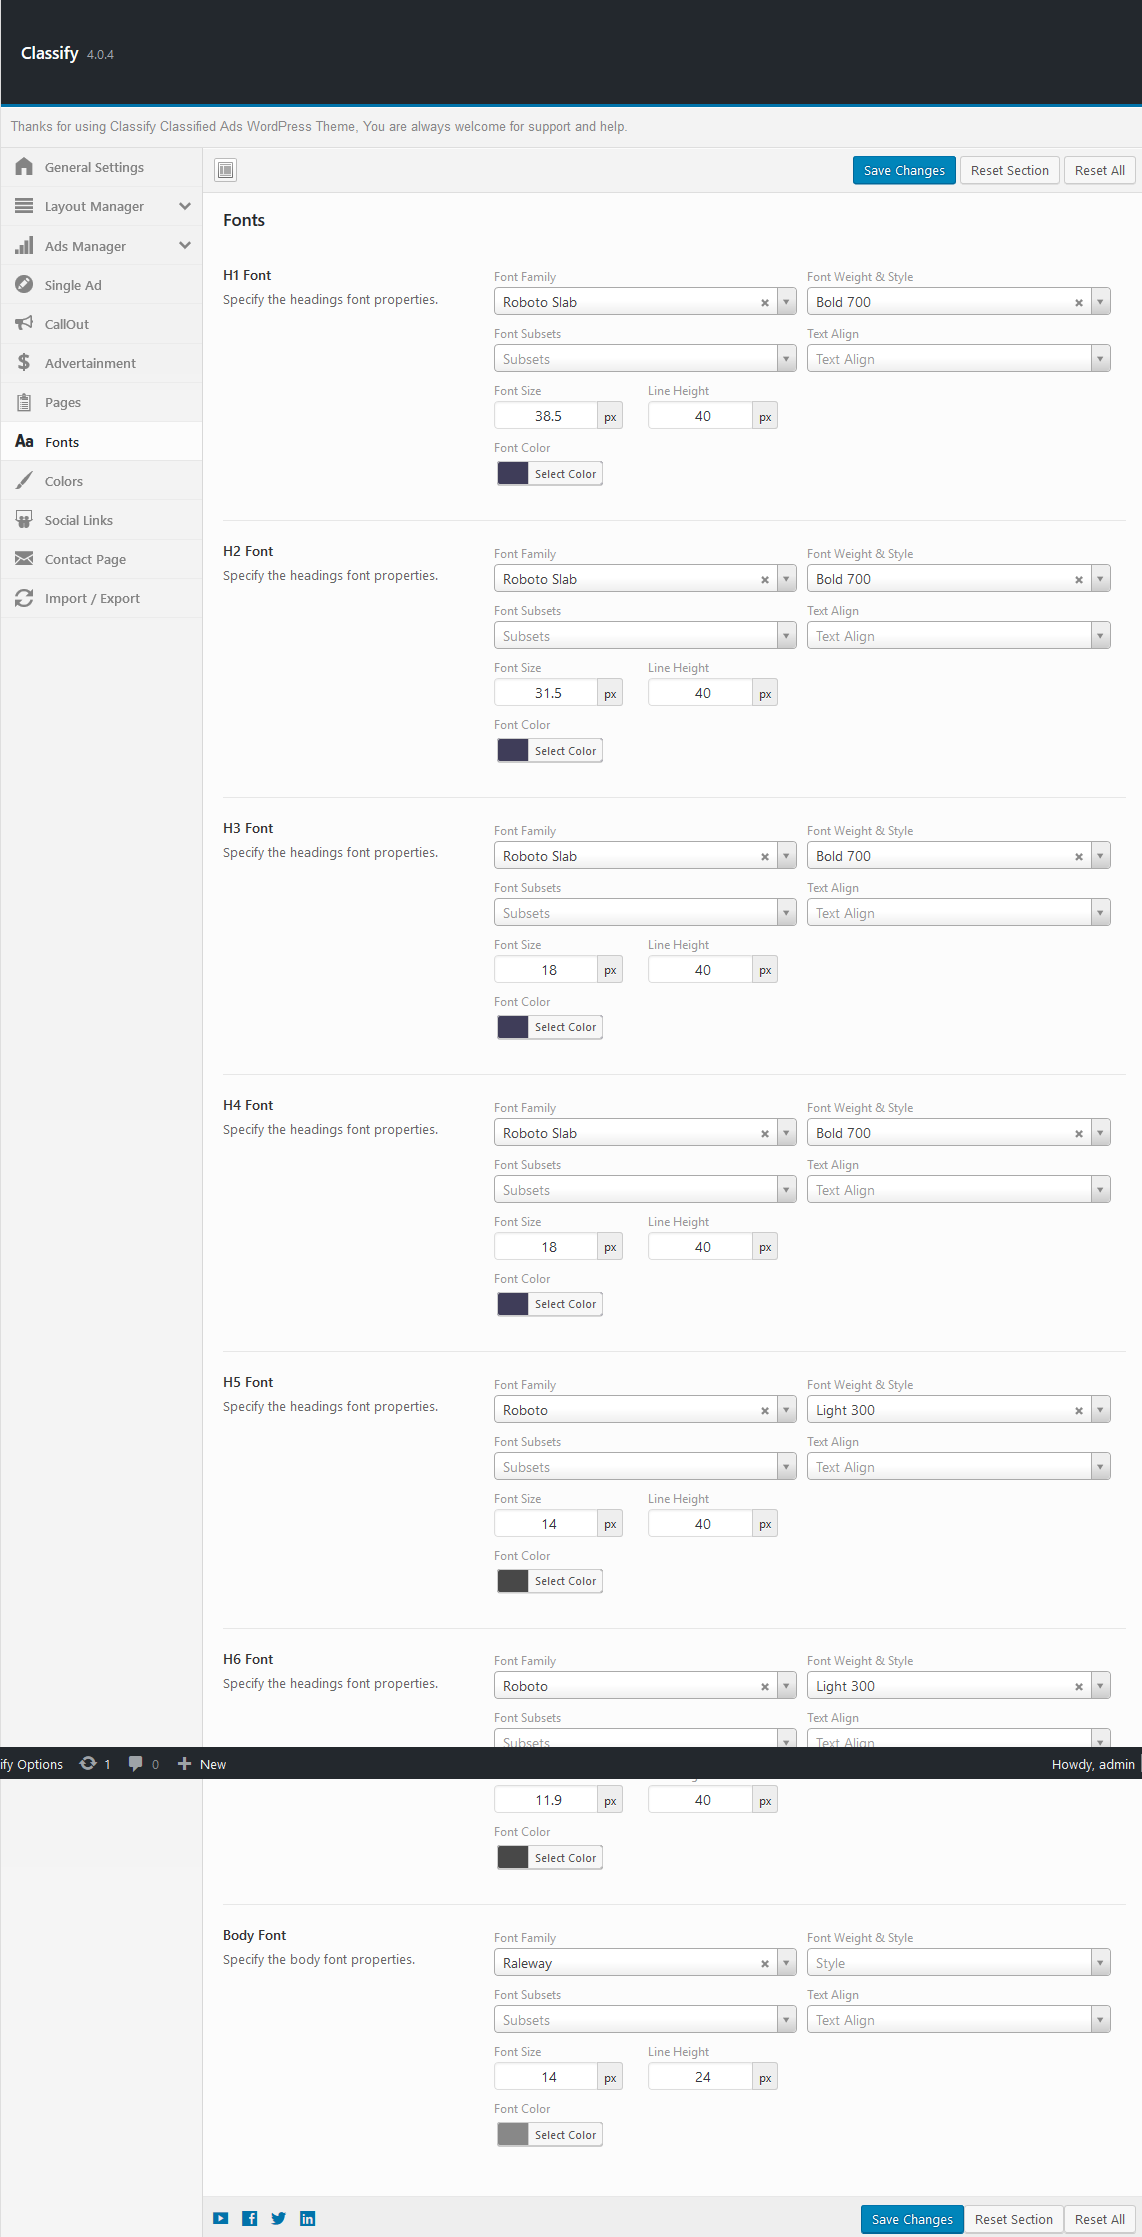
Fonts - top
Here you can change the font. Ther are available 650+ Google fonts.
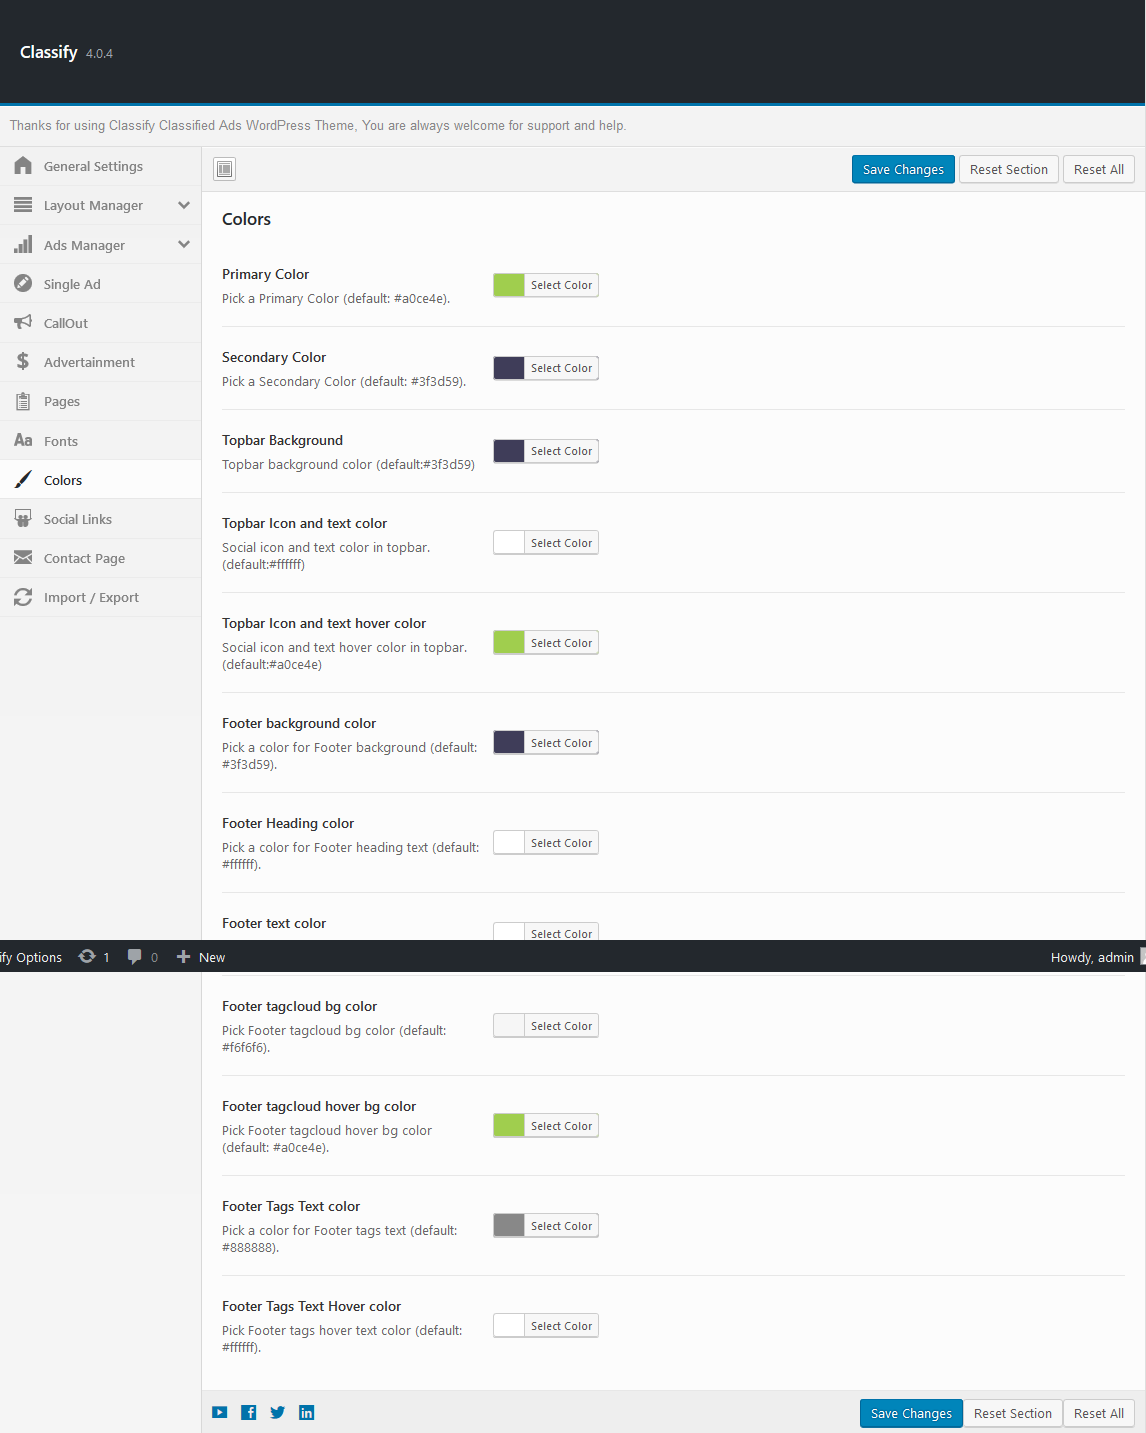
Colors - top
Here you can change the colors.
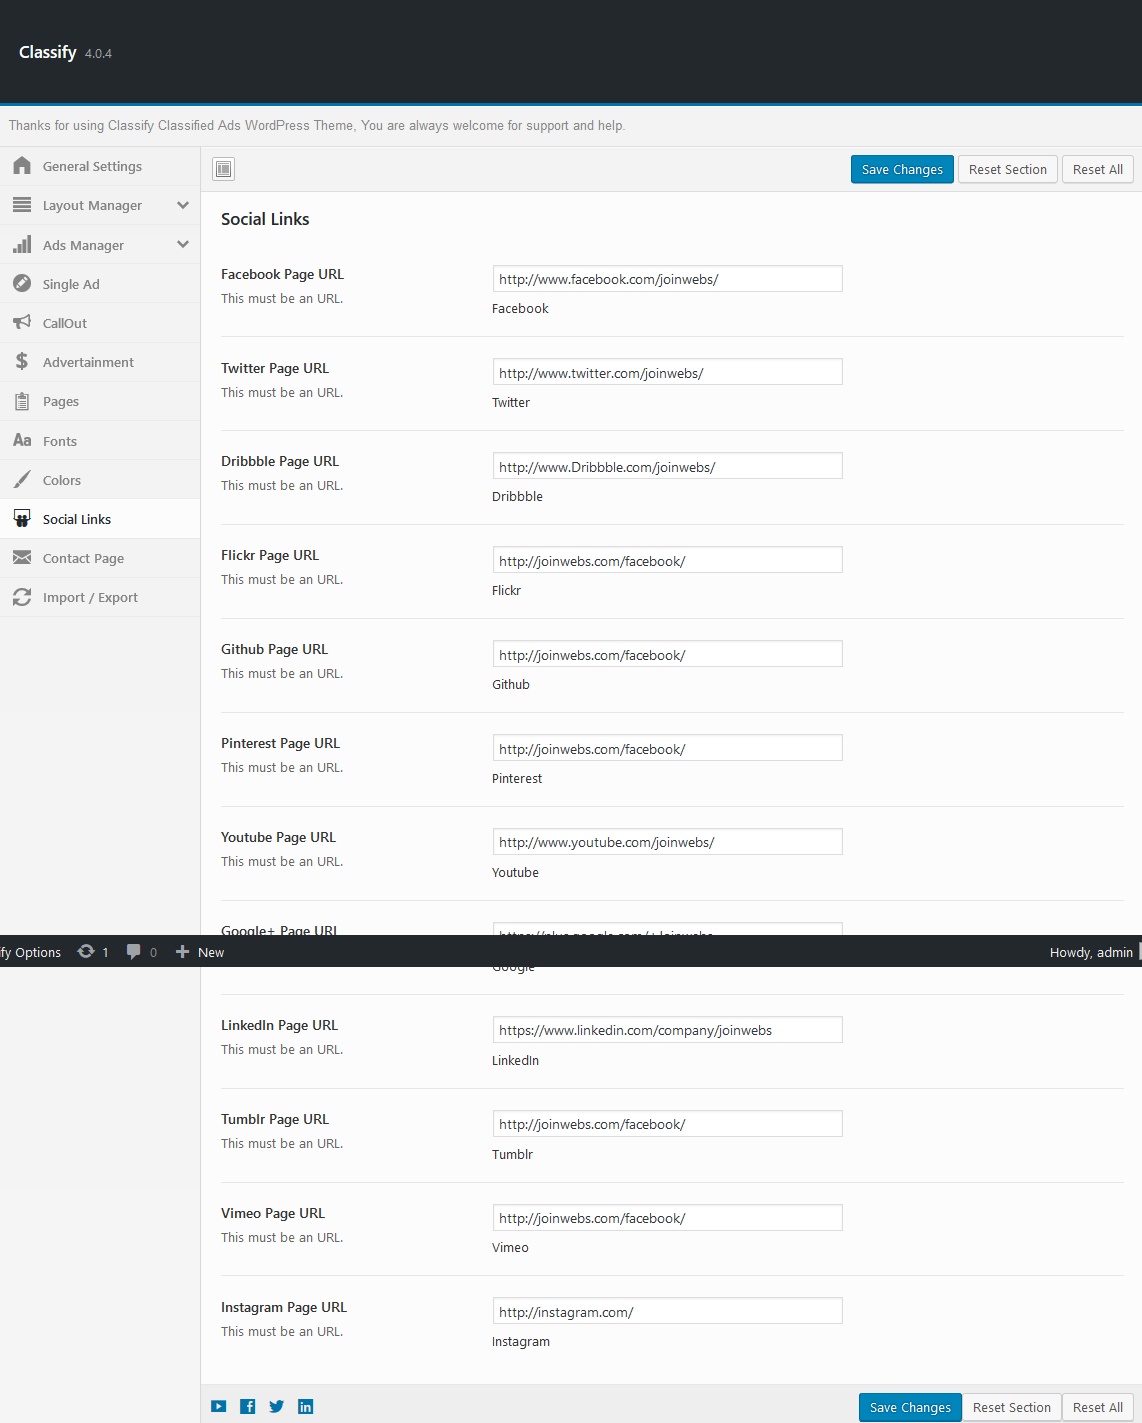
Here you can add the social links.
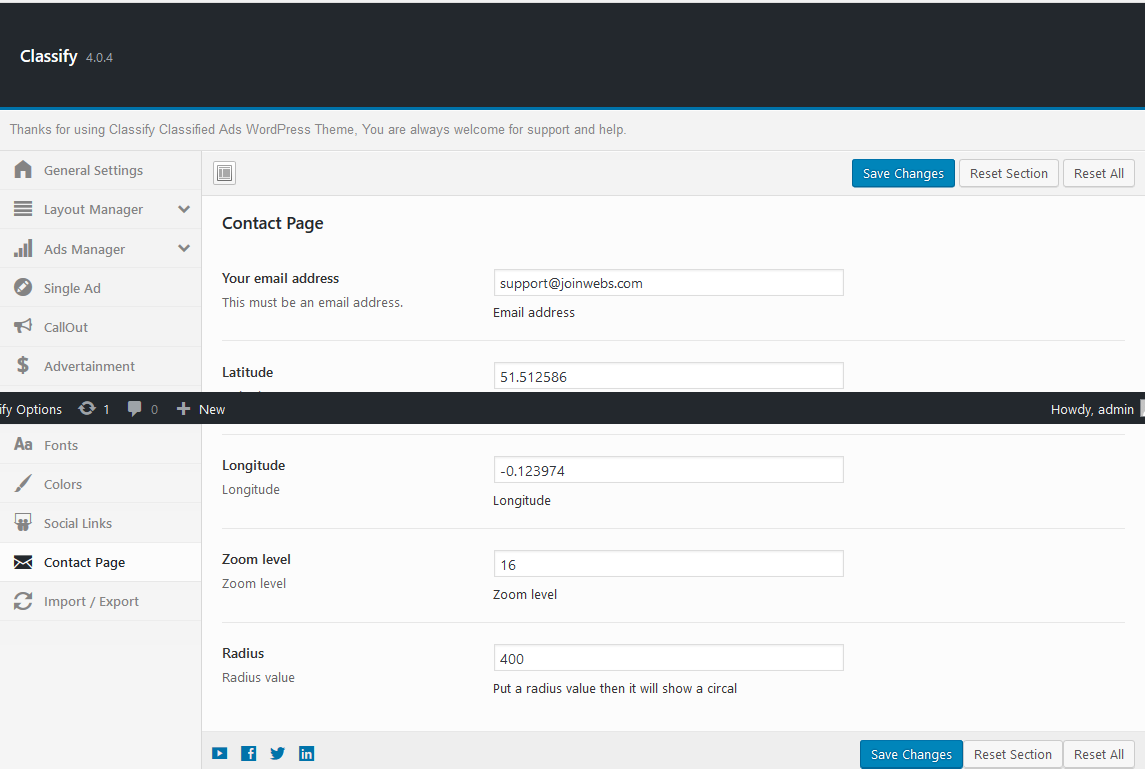
Here you can asetup the contact page.
Ads - top
You can add ads from front end even if you are the admin you must need to post from front end as standard posts or premium ads. There are two type of ads: regular and featured. For featured ads the user will need to buy a price plan. The spots for featured ads are above the regular on homepage, category page, archive page, search page and on sidebar. The featured ads will become regular when the period of time from price plan will end. The latest ad will be shown first (in both categories: featured and regular). The user can convert a regular ad into a featured one by simply editing it and selecting a price plan that he has bought.
Pricing Plan - top
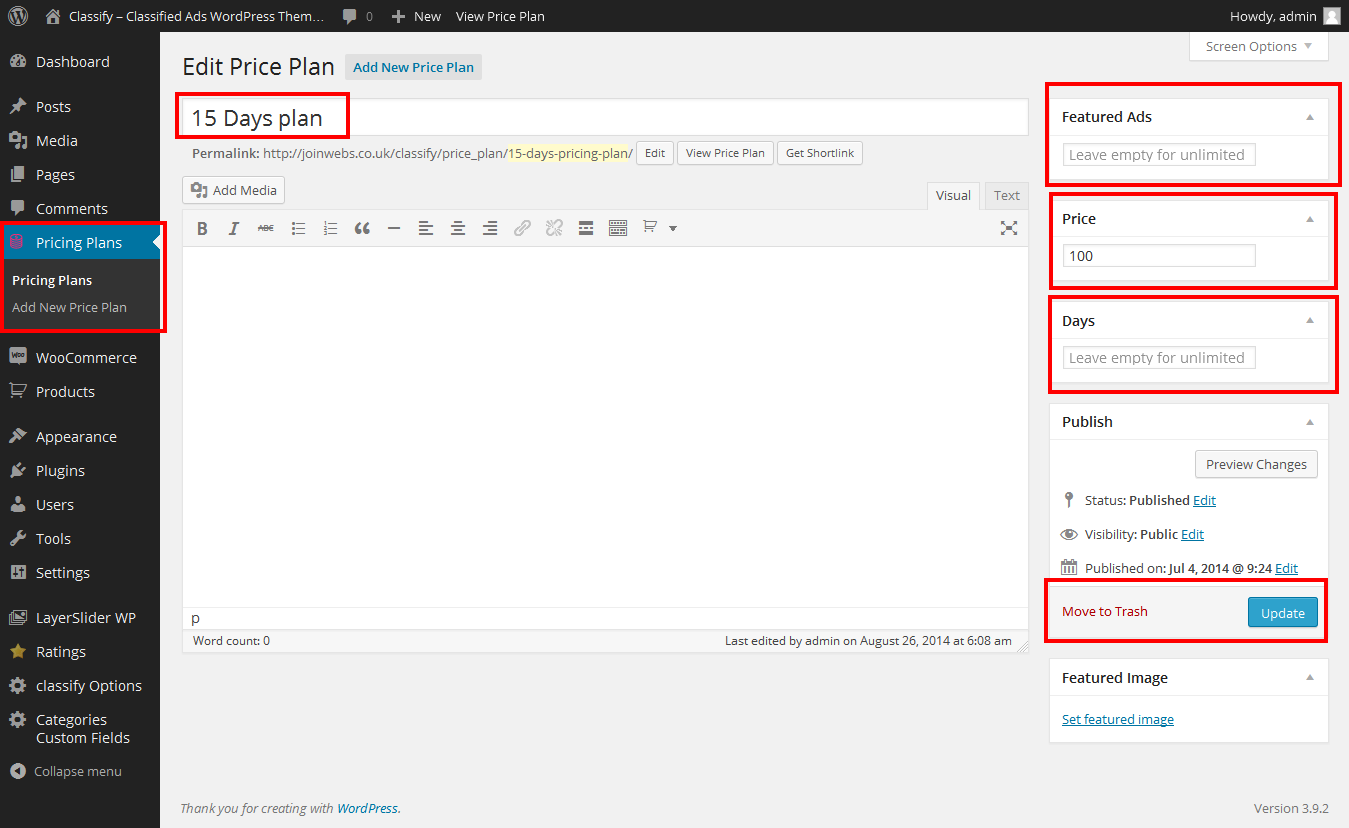
You can have an unlimited number of pricing plans. To add a new one please go to dashboard -> Pricing Plans -> Add New Price Plan. Please fill the name some description, the price (without the currency sign, it will be added from theme settings - see above.) the ads number and the ads active time. Publish it.
Also you can watch this video for Pricing Plans setup.
Pay per post - top
If you want to setup Pay Per post then you need to watch this video.
HTML Structure - top
The Theme uses valid HTML and comes with predefined classes for common elements needed in web design.
All templates share basic elements like header, footer, main, and entry so be carefull when editing those or adding/changing the CSS for those ids and classes :)
CSS Files and Structure - top
The CSS for the theme is split into various files: one that holds the basic markup for layout which is called style.css.
JavaScript - top
The theme uses advanced jQuery functions. You do not need to know how to use jQuery to activate them, almost everything is controlled by WordPress. All the function calls as well as as the custom created jQuery plugins are located in the custom.js file.
Once again, thank you so much for purchasing this theme. As I said at the beginning, I'd be glad to help you if you have any questions relating to this theme. No guarantees, but I'll do my best to assist.
JoinWebs